Homemade Pizza
Homemade pizza are easier than one thinks – several portions of dough can be made a head of time and frozen. Leave a portion on your kitchen counter for a couple of hours to thaw until it can be rolled into a crust. Toppings can be frozen until needed. Some need to be portioned before stashing them in the freezer such as Hot Italian sausage meat and beef.
The Crust
2 cups bread flour or all-purpose flour
1 cup semolina flour
1 envelope instant yeast /(1 tbsp)
1 tbsp good olive oil
1 tsp salt
2 tsp sugar
1 cup warm tap water (no hotter than 110 degF)
Toppings
Canned pizza sauce (Heinz, Del Monte) or homemade
Onions, finely sliced
Mushrooms, finely sliced
Hot Italian sausage or chorizo
Pepperoni
Anchovies in oil
Shredded mozzarella cheese
Pitted black olives
Italian pasta spice mix
Method
Put all the dry ingredients for the crust the Kitchenaid mix well with your hand or spoon. Make a well in the center and pour in the olive oil and the warm water. Turn on the Kitchenaid attached with the dough hook and slowly coax the flour into the center of the mixing bowl until a dough forms. Add more water if necessary – the dough should be soft and pliable but not sticky to the touch. Allowing the machine to knead the dough for about 5 minutes.
Empty the mixing bowl onto a work surface dusted with flour. Knead dough for about 5-7 minutes until the dough is smooth. Place a teaspoon of olive oil in the mixing bowl and place the ball of dough in and roll it around so that it is completely covered with the oil and the mixing bowl is evenly oiled. Cover with plastic wrap and leave it inside a cupboard or draft-free place to proof, about 2 hours.
Empty the risen down onto a floured work surface and cut it in 2 portions. Knead them into two smooth ball, about 2-3 minutes. Place one in a covered plastic container and freeze for future use. Allow the other dough to rest for 30 minutes wrapped in plastic wrap. Without kneading any further, rolled out the dough to about a 10-inch circle. Place it on a pizza screen and and gently stretch it evenly into the desired thickness and size. You are now ready to top the pizza.
Tasty Tocino
2 lbs pork butt with some fat, 1/8-1/4-inch slices
Marinade:
1 cup coconut/palm vinegar
1/2 cup soy sauce
2 cups brown sugar
1-1/2 tbsp salt
2 tbsps ground pepper
1 tbsp garlic powder (say, about 1 garlic bulb, microplaned)
1 tbsp hot chili powder, optional (I like it spicy)
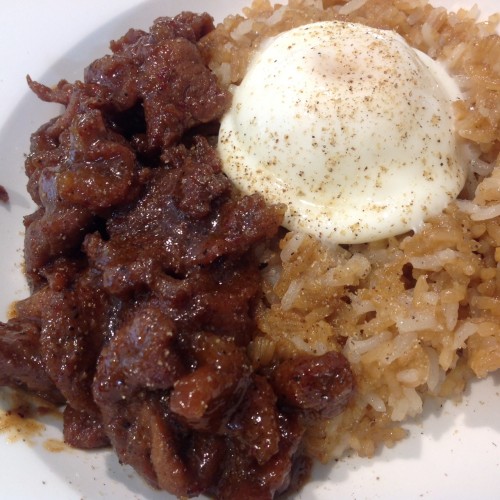
Mix all the ingredients and pour over the thinly sliced pork butt (2 lbs). Try to buy a piece with some fat on it. Mix the meat well in the marinade and let it sit covered in the fridge for 3-5 days before portioning it into bags and freeze (a 4-oz portion should be enough for one person). Divide the marinade between the portions.
To cook, defrost the bag of tocino and place in a shallow non-stick pan, if available, covered, on medium heat. DO NOT add any water. The marinade should be enough to cook the meat. When it starts to simmer, turn it down to low. When the liquid has evaporated and starts to thicken, stir it to keep from burning. You can choose to have a little gravy or let it dry up more before serving. The sugar in the marinade will caramelize but do not let it stick and harden on the pan (save you from some serious scrubbing).
Serve over garlic fried rice topped with a 1-minute microwave-poached egg for a volcanic sumptuous breakfast!
Oven-braised BBQ Pork Country Style Ribs
This recipe originated from Gourmet Magazine in the 80s, if I am not mistaken. But over the years I have revised and adapted it to my taste. The original recipe called for 12 pounds of spare-ribs which is a little much for a small family. The following recipe will serve a family of four with leftovers.
Ingredients:
Sauce:
2 cup chopped onions (about 2 medium onions) – 1
6 garlic cloves, microplaned – 3
1/2 stick of butter – 1 tbsp
3 tbsp canola oil – 1 tbsp
1-1/2 cups tomato puree or chopped (about 3-4 Roma tomatoes or 14 oz canned tomatoes) – 2 chopped tomatoes
1 cup firmly packed brown sugar – 1/4 cup
1/3 cup soy sauce – 2 tbsp
1/3 cup rice vinegar – 2
3 tbsp chili paste (chili olek with or without garlic)
Meat:
3-4 lbs country-style or regular spare-ribs, cut into strips with the bone in the middle. You can also have the butter cut the rib down the middle lengthwise and then cut the rib into pieces with the bone in the middle. This makes the individual ribs shorter and easier to serve.
To make the sauce, add the butter and oil in an oven-proofed dutch oven which can accomodate all the spare ribs in one layer, or a little more. Let the butter melt and add the chopped onions and saute until translucent. Add the minced garlic and saute for another minute and add the pureed tomatoes, brown sugar,soy sauce and vinegar and the chili paste. Allow to simmer for 20 minutes. Add 1 cup water and bring it to a simmer. Add the ribs, carefully packing and arranging them in one layer, if possible, and add enough water to just cover. Gently bring it to a simmer, cover, and placed it in a 275 degree F ore-heated oven for about 2 hours. After about 2 hours the ribs should be fork-tender and almost falling apart but still maintaining its shape. DO NOT stir or the ribs will break apart and becomes a mess!
This dish is best made a day ahead and gently reheated. If the sauce is too watery, gently remove the tender ribs and keep warm, and turn up the heat to reduce the sauce until syrupy. Leftover sauce is excellent for making rigatoni or spaghetti, or slathered over roast chicken.
Lor Hon Jai – A CNY Special
Chinese New Year is around the corner and the one dish that signifies the “crossing” into the new year for the Cantonese is the “Lor Hon Jai.” It seems like a tauntingly complicated dish with 15+ ingredients, but if you systematically space out the preparation of each ingredient over several days, it does not seem so difficult, it is almost a yearly ritual getting ready for the New Year! The trouble is, I never bothered to write it all down and every year I have to painstakingly recall what goes into the dish. No more of that, this year it is going to be written down before my memory fails me!
“Chai” suggests vegetarian but according to hard-core Asian vegetarians, my recipe far from qualifies – to start, dried oysters is one, and the use of garlic is the other. The oysters definitely add that umami taste to the dish which complements and rounds out the overall flavor of the dish.
I grew up with eating this concoction of flavors and textures every Chinese New Year (CNY), salivating in anticipation of the reunion dinner which started late on the evening of CNY eve. Late because it was intended that the dinner will last past midnight into the CNY and there would be “plenty” left in the rice pot and on the table! There were other dishes on the table too, notably “larp mhey” (preserved meats which I will write more on later) which goes very well with the “lor hon chai.” These 2 flavors in combination brings back nostalgic memories of CNY growing up!
On this auspicious occasion, mom would make it a point to cook more rice lest dad hears the bottom of the pot being scraped. All hell would break loose! Not having enough rice in the rice pot would signify a less than prosperous new year! We would have enough “chai” to last a few more days and whenever friends and family show up to pay their respects, other than the candy and cakes offered to sweeten their new year, we would offer them a small bowl of “chai” and some rice, which is an unusual treat to many who looked forward to this once a year at our house.
“Lor hon chai” is dish with an acquired taste – one may not appreciate the subtleties and combination of flavors tasting it for the first time. So, don’t serve too much to someone who is tasting it for the first time, because it is not an inexpensive dish to make! Let them ask for more of they like it.
Ingredients:
1/2 a packet of 1.5 oz dried cloud ears (wan yee)
8-10 whole hoe see (dried oysters) – optional and if available
18 Chinese dried shitaki mushrooms
1/2 of 4-oz packet dried lily flower (kam chum)
1/2 of 1-oz packet fatt choy (black moss)
1/2 of 8-oz packet of theem chook (sweetened bean curd sheets)
1 large Napa cabbage (about 3 lbs)
1 15-oz canned button mushrooms
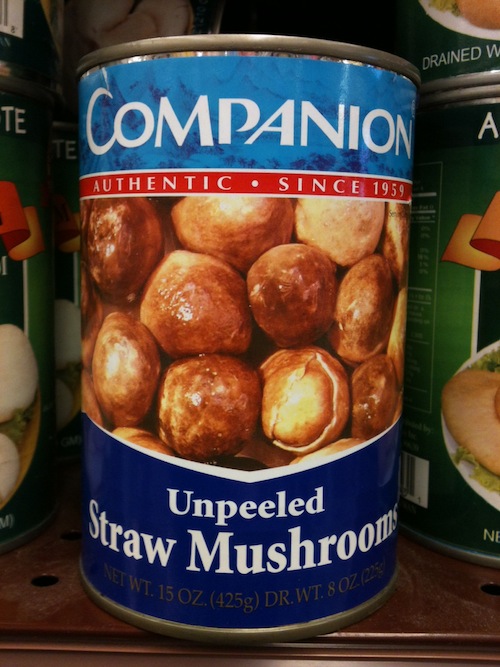
1 15-oz canned straw mushrooms
1 15-oz canned pak kor or 9-oz fresh vacuum-packed (gingko nuts)
1 10-0z canned cha’i-pow-yu (mock abalone)
1 packet fried meen kan balls
1 meen kan (fresh gluten) – if available
18 tow fu pok (fried tofu)
1 bottle lharm yue (red fermented bean curd)
1-inch fresh ginger, microplaned
8 pips garlic, microplaned
1/4 cup canola oil
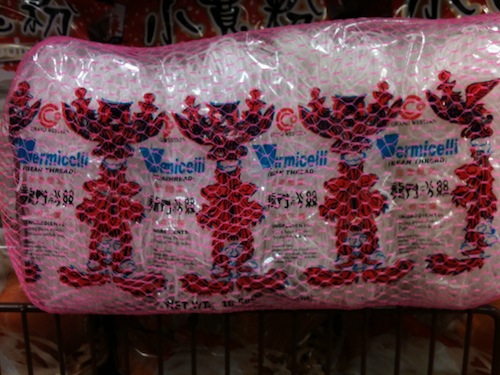
1 bundle fun see (mung bean vermicelli)
Preparation of Ingredients:
dried cloud ears (wan yee):
Place the dried cloud ears in a medium size container and pour hot water over them to cover. Let sit for 30 minutes and wood ears will triple in size once re-hydrated. Pick up each clump of wood ears and check for woodsy remnants still attached to it. This is the base of the clump where the wood ears used to be attached to the growing medium, usually you can tell from the white spot. Snip it off with a pari of kitchen shears or just pinch it off with your fingers. Separate the clumps into even large pieces, and rinse it to remove any grit or sand. Place them in a plastic bag and refrigerate for later use.
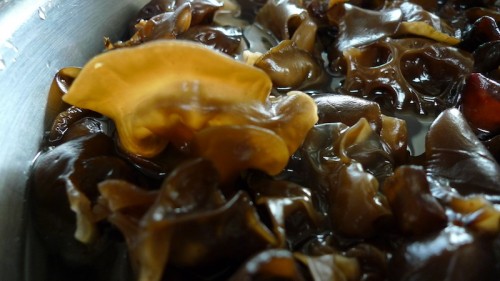
Rehydrated Cloud Ears
hoe see (dried oysters):
The hoe see is not really completely dehydrated when bought at the Asian market. Soak them in cold water for about 30 mins and rinse it to make sure there is no grit or sand. Heat a couple of tablespoons of oil in a wok, saute the hoe see with 3 minced garlic and a 1/2 inch piece of minced ginger until the hoe see are fragrant. (This should take away the fishy taste which permeates the jai after it is cooked). Place in sealed container and refrigerate for later use. It is not easy to find hoe see anymore at the Asian markets because they are expensive and an acquired taste but a necessary flavor in the melded taste of the dish.
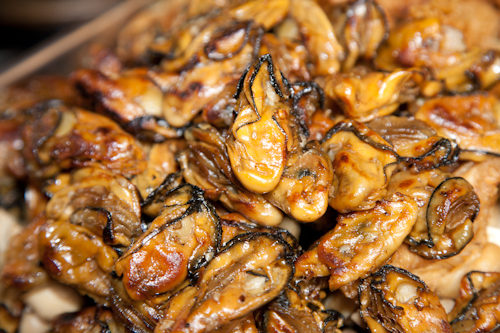
Re-hydrated (dried oysters) Hoe See
18 Chinese dried shitaki mushrooms:
Cover the mushrooms with cold water and allow to soak until you can easily cut off the stem where it attaches to the bottom of the cap. Rinse and place mushroom in a medium pot and bring to a boil, lower the heat and simmer, covered, until mushroom is tender. This could take between 45mins to an hour depending on the type of shitake mushrooms. Check for doneness by poking it with a toothpick. Halfway through simmering the mushrooms, add the hoe see to the mushroom and let simmer together until mushrooms are done. Assuming, you don’t have a lot of liquid left from the simmering, save the liquid for cooking the lor hon jai because all the flavor from the mushrooms and hoe see is in it. Set aside or refrigerate for later use.
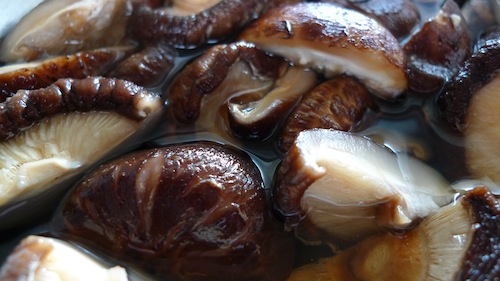
Re-hydrated Shitaki Mushrooms
1/2 packet of dried lily buds (kam chum):
When buying dried lily buds, look for those which are lighter in color. There are 2 ends to a dried lily bud. One end is usually hard. Pinch off the hard end and if the other end is equally hard, pinch it off too. Rehydrate them in cold water for an hour or so, rinse, and set aise for later use.
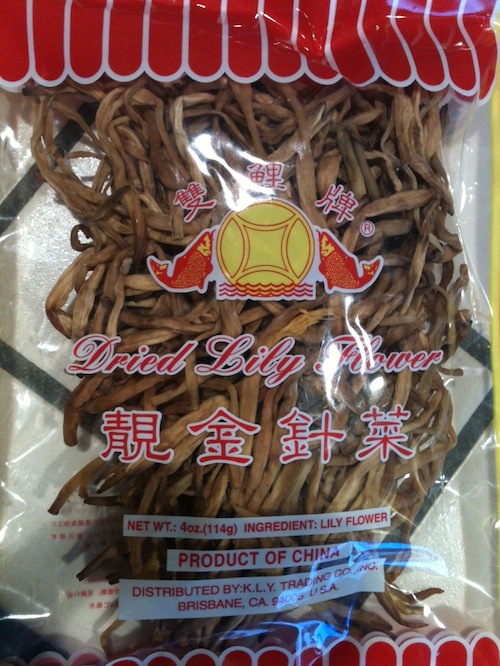
Dried Lily Flower
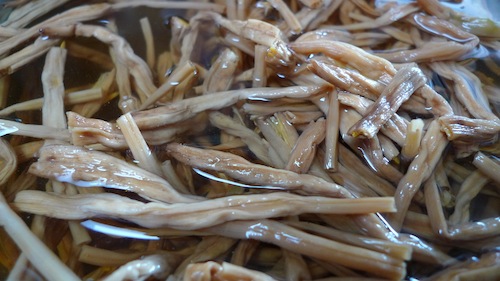
Re-hydrated Lily Buds
1/2 packet fatt choy (black moss):
Cut off half the dried fatt choy and save the other half for next year, but if you like more of it, use the whole packet! More fatt choy could suggest added prosperity! Soak them in cold water for a half hour on the day when you are assembling the lor hon jai. When adding it to the lor hon jai, do not just throw in the entire clump. Using your fingers, pull off small clumps and place them in the pot with the other ingredients, the smaller the clumps the better so that they can be missed in evenly.
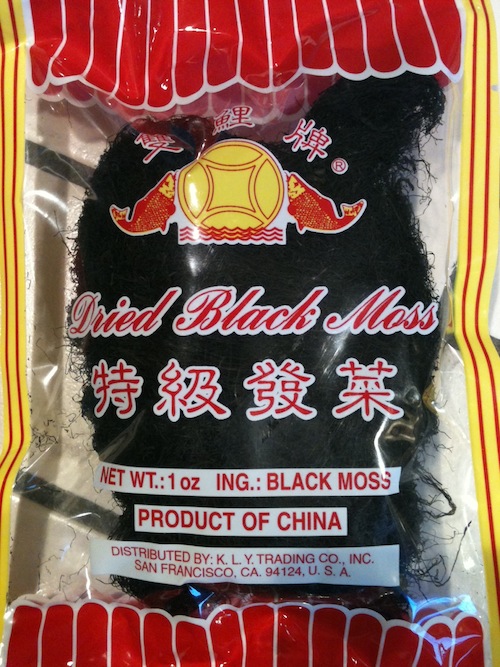
Dried Black Moss
1/2 8-oz packet theem chook (sweetened bean curd sheets):
From the long end, cut them into 1/2″ strips and deep-fry them in batches on medium heat. They brown very quickly because they are sweetened. Do not burn them as they will give your lor hon jai a burnt taste. Set them aside. Do this on the day of your cooking the lor hon jai. The oil you used and the wok you deep-fried them in will be used for cooking the lor hon jai.
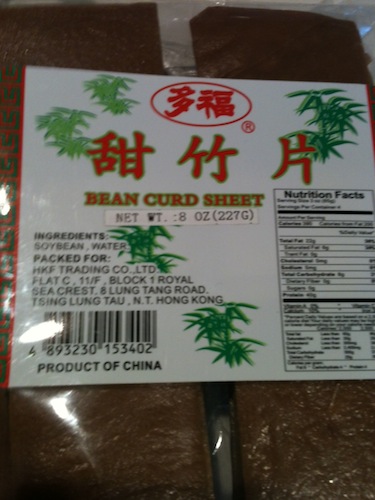
DriedBean Curd Sheets
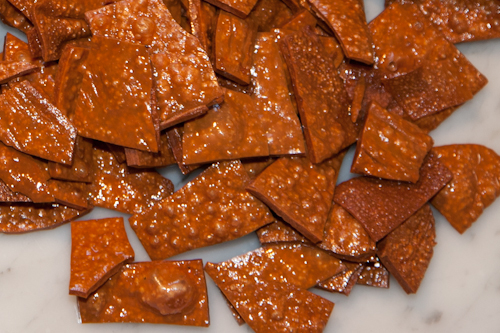
Fried Theem Chook
1 packet fried meen kan balls
Bring to a boil 2 cups of water in a wok and place the fried meen kan balls in and cover. This is done to deflate the balls and re-hydrate them. About 5-10 mins. Set aside and discard the liquid.
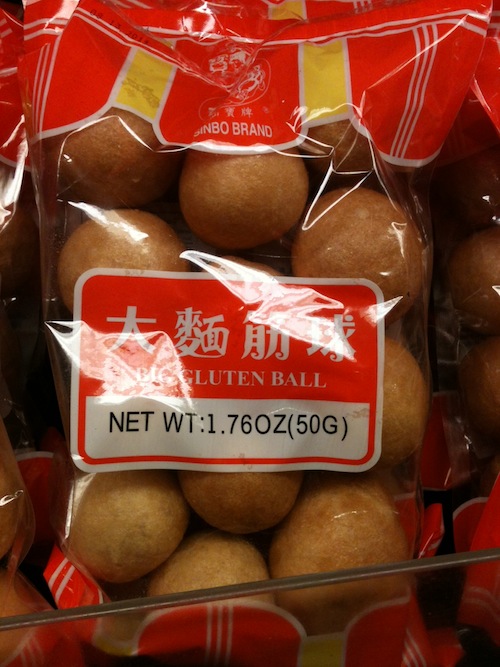
Fried Gluten Balls
1 meen kan (fresh gluten) – if available
This ingredient is getting to be a rare commodity at the Asian markets. They are usually seen at the vegetarian section together with the tofus and soaking in liquid and sold by the piece. Slice them cross-wise into 1/4-inch coins and set aside.
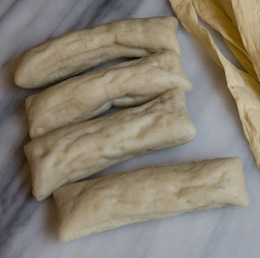
Fresh Meen Kan
18 tow fu pok (fried tofu or soya bean cake)
These are fried pieces of tofu, some can be as large as 1″ cube. If they are big, cut them in half, but if they are bite-size, leave them as is. No prep required.
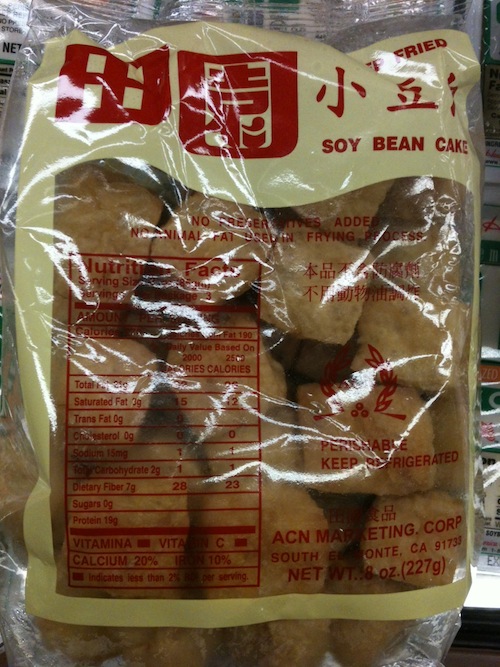
Tofu Pok
1 bottle lharm yue (fermented red bean curd)
There are several brands of fermented red bean curd, mostly from China, but there is one that is of a higher quality labeled “Shanghai Style”. I have used these for years and it smells of cooking wine. It has gotten expensive compared to the other brands. I feel you can use the less expensive ones and not be able to tell the difference. Empty the entirely container into a mixing bowl and together with the liquid, mash the cakes of curd down to a thick homogenous sauce. Set aside.
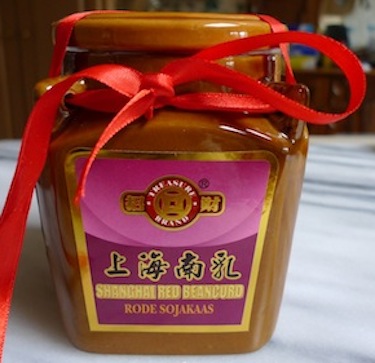
Fermented Red Bean Curd – “Shanghai Style”
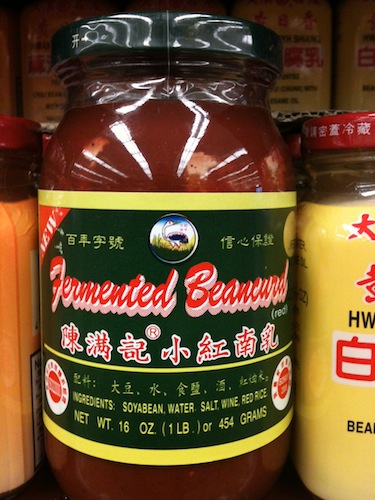
Red Bean Curd
1 15-oz canned button mushrooms
Discard the liquid that comes with the canned mushrooms. If the mushrooms are too big, cut them into halves and set aside. For the rest of the canned vegetables below, again, discard all the liquids that come with the vegetables and set aside.
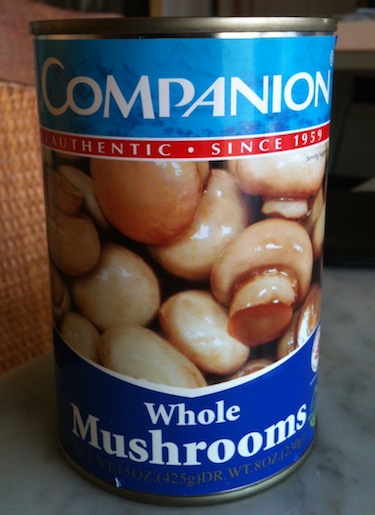
Canned Mushrooms
1 15-oz canned pak kor or 9-oz fresh vacuum-packed (gingko nuts)
If fresh vacuumed-pack gingko nuts are not available and canned ones are, drain and discard the liquid and set aside.
1 bundle fun see (mung bean vermicelli)
Do not add the fun see to the pot of lor hon jai because when you reheat them again the fun see turns to a starchy mess. I always add fun see whenever I reheat a portion of the lor hon jai for dinner. Soak 1/2 a packet or a packet in hot water from the tap and let sit for 15 mins. When the lor hon jai comes to a simmer, add the rehydrated fun see and simmer until the lor hon jai is re-heated. Fun see cooks fast and should not be al dente.
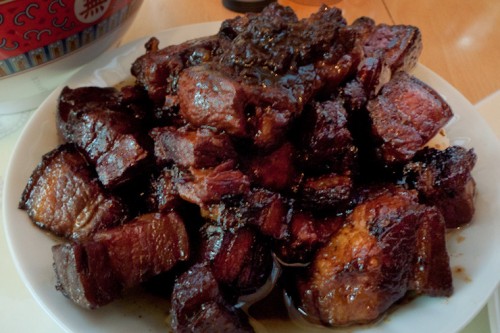
Soy Sauce Pork
1.5 – 2 lbs pork belly with skin, cut into 1/2-3/4 inch cubes
8 cloves garlic, smashed flat (no need to chop)
2 thick slices of ginger
2 tbsp light soy sauce
4 tbsp dark soy sauce (Pearl River Mushroom Flavored)
4 tbsp sugar
1 tsp five-spiced powder
1 tbsp freshly ground pepper.
2 tbsp cooking oil
Heat oil in wok until just smoking. Add ginger and garlic and saute till garlic is turning lightly brown. Add pork and saute for about 3 mins or until the pork just loses it’s pink on the outside. Add five-spice powder and 1 tbsp of light soy and keep sauteing for 2 mins (the soy would caramelize on the pork). Add the 2nd tbsp of light soy and and saute for another 2 mins. Add the sugar and saute until pork is evenly coated with the sugar (3 mins). Turn the heat down to medium and add the thick soy sauce and give it a few turns to mix. Add water to just barely cover the pork (top of pork is slightly exposed). If using slow cooker, add the water only after you have placed the pork in the cooker. Never boil the pork! Let it simmer gently and give it a stir once in a while until the pork is tender and the sauce is reduced and thickened from the gelatinous skin. There should be barely 1/2-3/4 cups sauce left. Salt to taste.
Dad’s Favorite Salad Dressing
Basic salad dressing has a ratio of 1 part acid to 3 parts oil, which are the foundation for any creative flavors you might like to experiment with. Here is my favorite, and you guessed right, it has a strong Asian flavor , easy to put together, and can be made ahead of time and refrigerated.
2 tbsp white vinegar (I usually have vinegar left over from pickling habanero chilies – use 4 tbsp because it had been watered down)
1 tbsp Dijon mustard, or any good mustard left over eating corned beef on St. Patrick’s (not those yellow hotdog-type mustard, deli-type is ok)
2 tbsp Thai sweet chili sauce (Maeploy)
1 tbsp soy sauce
1/2 tbsp sesame oil
1 tbsp honey
1 small clove garlic, microplaned fine
1 inch fresh ginger, peeled and microplaned fine
1 stalk green onions, finely chopped (optional)
pinch of salt
freshly ground black pepper
6 tbsps good olive oil, the best that you can afford
Place all the ingredients into a mixing bowl except the olive oil. Slowly drizzle and whisk the olive oil onto the mixture until the mixture emulsifies. Just before serving, pour sufficient amount of the dressing onto the prepared lettuce, add croutons if desired, and toss. There should be enough dressing for salad for 4 persons. Lettuce should not be swimming in dressing, but it should lusciously coat the individual bite-size pieces.
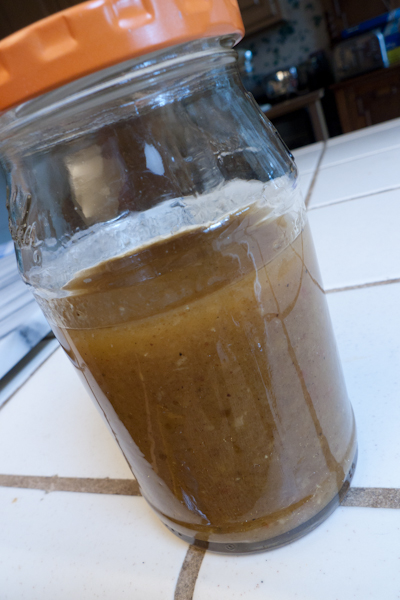
Leftover dressing can be stored in an airtight jam jar for up to 10 days in the refrigerator. Give it a good shake before pouring it onto the salad.
Steamed Fish
1 lb white fish fillet or 1-1/2 lb whole fish
3/4 inch fresh ginger, finely julienned or microplaned
1 green onion, julienned
3 tbsp soy sauce
1 tsp dark soy, Pearl River Mushroom Flavored
1 tbsp oyster sauce
1/2 tsp sesame oil
fresh ground pepper
few pieces of pickled habanero, chopped (try not to touch the peppers)
3 cloves garlic, minced or microplaned
4 tbsp canola
Get the steamer boiling.
Use a serrated knife to check to see if the fish is cleanly scaled, clean the cavity and rinse the fish. Place fish on a plate and sprinkle half the ginger on the top of the fish. When the water is boiling, place the fish into the steamer, cover (never, never open the cover to check!) and steam for 15 minutes. While the fish is steaming, put the oil, garlic and rest of the ginger in a small pot on moderate heat. Saute until the garlic is just turning color. Remove from heat and add the rest of the ingredients except the green onions. When the fish is done, remove from the steamer and pour the sauce over the fish and garnish with the green onions and serve right away.
Warming Up Pizza Slices Over Stove
Firing up an oven to warm up a couple of leftover pizzas is a waste of energy! You can achieve the same thing on the stove top using a covered fry pan. On high heat, warm up the fry pan and place the pizza slices in it and cover. Turn down the heat to medium for about 3 mins, and then on low heat for 10 minutes. It is basically creating an oven-like condition warming up and crisping the bottom of the crust. After a few tries on your specific stove top, you should be able to time it perfectly without having to watch over it!

Re-heating leftover pizza
Pickled Habanero Peppers
An excellent spark to fire up your taste buds when eating almost anything! Just don’t kiss your wife or girlfriend after chewing one! And keep away from kids! Do wear gloves when cutting them into pieces for pickling.
1/2 lb habanero peppers
1 cup water
1 cup white vinegar
Cut the habaneros cross-wise into 1/4-inch rings and remove the seeds. Place them in small jars with a cap. Mix the vinegar and water in a pourable container and pour them over the cut peppers until just covered. Cap and place in the refrigerator. Use a clean spoon or fork to take out the pieces when needed – a piece or two will suffice to accompany a meal! They are fiery hot, but yum! Save the vinegar solution after the habaneros have all gone – they make great flavored vinegar when making salad dressings!
- pickled habaneros
Char Siew Pow
“Char siew” means roast pork and “pow” means bun. “Char siew pow” is a steamed bun filled with a savory roast pork. This version which I prefer is a soy sauce pork braised to fork-tenderness, diced, refrigerated overnight to facilitate easy filling of the “pows.” You can also buy “char siew” from the Asian supermarket deli and ask for some of the gravy so that the filling won’t be too dry. The “pows” can also be filled with anything savory such as chicken curry, beef curry, beef ball or filling for wantons. The recipe is straight forward, the skill lies in the pleating and wrapping of the filling into a “pow.”
The “Pow”
3 cups all purpose flour
1 packet dry yeast
2 tbsps sugar
2 tbsps vegetable oil
1/2 cup plus warm water (110 degF)
Place all the dry ingredients into a mixing bowl and stir to mix. Make a crater in the center and add the oil. Slowly add 1/2 cup of the warm water into the crater and in a circular motion outward, incorporate the flour mixture with the liquid until the a dryish dough starts to form, adding more warm water a teaspoon at a time. Dough should not be too wet or sticky. Once it forms into a ball and is workable without sticking to your hands, the dough is ready for kneading. Lightly flour your work surface and knead the dough for about 3 mins and form it into a ball. Lightly oil the dough and the mixing bowl. Place the dough into the bowl and cover with saran wrap or cloth and leave to rise in a draft-free place, about 2 hours. The dough would have triple in size and little holes at the top.
While dough is proofing, prepare the filling. Dice the “char siew” and leave it in refrigerator or freezer for the sauce and oil to coagulate for easy filling. Cut a couple of dozens of 2″ x 2″ parchment paper as a base for the “pows” once they are filled and wrapped.
Punch the dough down and knead until dough is smooth and seamless, about 2 minutes. Roll dough into a 1-1/2 inch roll and cut into 1 inch pieces. With a small wooden rolling pin cut from a broom handle (you can buy this small rolling pin from an Asian cookware store), roll the dough into a circle, the dough thicker in the middle than the edge – this is to ensure that the filling does not leak through the bottom. This is not crucial as long as the bottom is not punctured.
Using a small spoon, place a small amount of filling in the middle of the rolled out dough on one hand, and pleat the edges together with the other hand. Place the filled “pow” onto a sheet of parchment square and onto a steaming tray to proof a second time. This second proofing will not double in size. When the “pows” look puffy and the pleats appear to be coming together, about 30-45 minutes, bring water to a boil in a wok and place the tray of “pows” in to steam, covered, for 10 mins. They are excellent right out of the steamer. If you have more “pows” proofing and ready for steaming, it is alright for them to wait their turn. Once steamed, the “pows” can be refrigerated in a ziplock bag and can be reheated individually, covered, in a microwave for about 30 secs, depending on your microwave.
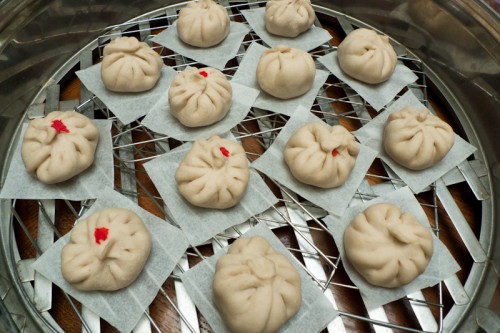
pows proofing in steaming tray, color-coded for different fillings
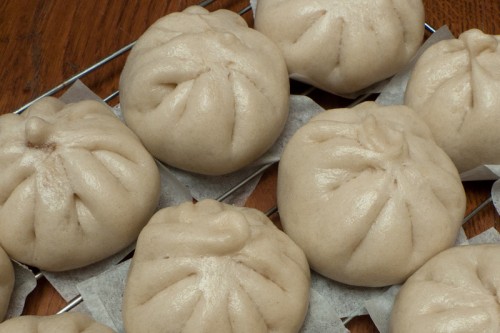
steamed pows
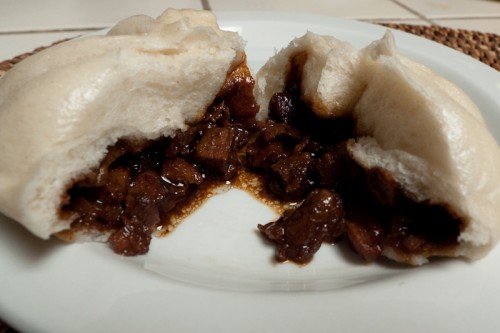
steamed charsiew pow
